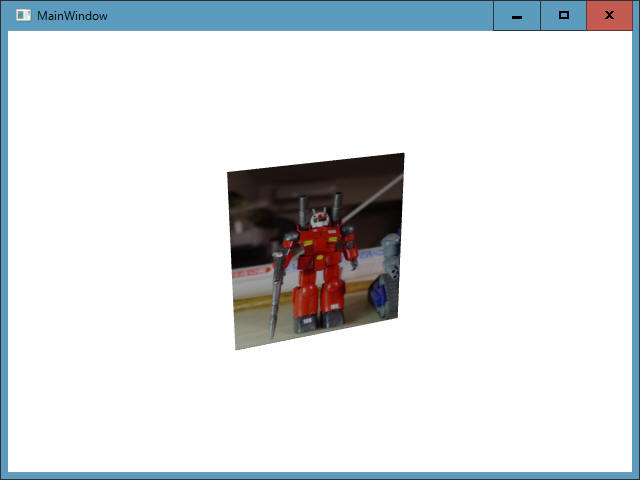
3Dモデルの面に、テクスチャでイメージを貼り付けすることができます。
まずはシンプルな四角形へイメージを貼り付けてみます。
[環境]
[実行結果]
<Window x:Class="_3D_Texture_Image.MainWindow"
        xmlns="http://schemas.microsoft.com/winfx/2006/xaml/presentation"
        xmlns:x="http://schemas.microsoft.com/winfx/2006/xaml"
        xmlns:d="http://schemas.microsoft.com/expression/blend/2008"
        xmlns:mc="http://schemas.openxmlformats.org/markup-compatibility/2006"
        xmlns:local="clr-namespace:_3D_Texture_Image"
        mc:Ignorable="d"
        Title="MainWindow" Height="480" Width="640">
    <Grid>

        <Viewport3D>
            <!-- カメラ  -->
            <Viewport3D.Camera>
                <PerspectiveCamera Position="-3,3,7" LookDirection="3,-3,-7" UpDirection="0,1,0" FieldOfView="45"/>
            </Viewport3D.Camera>

            <ModelVisual3D>
                <ModelVisual3D.Content>
                    <Model3DGroup>
                        <!-- ライト -->
                        <DirectionalLight Color="White" Direction="0,-1,-1"/>

                        <GeometryModel3D>
                            <GeometryModel3D.Geometry>
                                <MeshGeometry3D>

                                    <!-- 頂点 -->
                                    <MeshGeometry3D.Positions>
                                        -1,1,0
                                        1,1,0
                                        -1,-1,0
                                        1,-1,0
                                    </MeshGeometry3D.Positions>

                                    <!-- テクスチャ -->
                                    <MeshGeometry3D.TextureCoordinates>
                                        0,0 1,0 0,1 1,1
                                    </MeshGeometry3D.TextureCoordinates>

                                    <!-- 三角形 -->
                                    <MeshGeometry3D.TriangleIndices>
                                        0,2,3
                                        0,3,1
                                    </MeshGeometry3D.TriangleIndices>

                                </MeshGeometry3D>
                            </GeometryModel3D.Geometry>

                            <!-- マテリアル -->
                            <GeometryModel3D.Material>
                                <DiffuseMaterial>
                                    <DiffuseMaterial.Brush>
                                        <ImageBrush ImageSource="P1040735.jpg"/>
                                    </DiffuseMaterial.Brush>
                                </DiffuseMaterial>
                            </GeometryModel3D.Material>
                            <GeometryModel3D.BackMaterial>
                                <DiffuseMaterial>
                                    <DiffuseMaterial.Brush>
                                        Green
                                    </DiffuseMaterial.Brush>
                                </DiffuseMaterial>
                            </GeometryModel3D.BackMaterial>
                        </GeometryModel3D>
                    </Model3DGroup>
                </ModelVisual3D.Content>
            </ModelVisual3D>
        </Viewport3D>
    </Grid>
</Window>
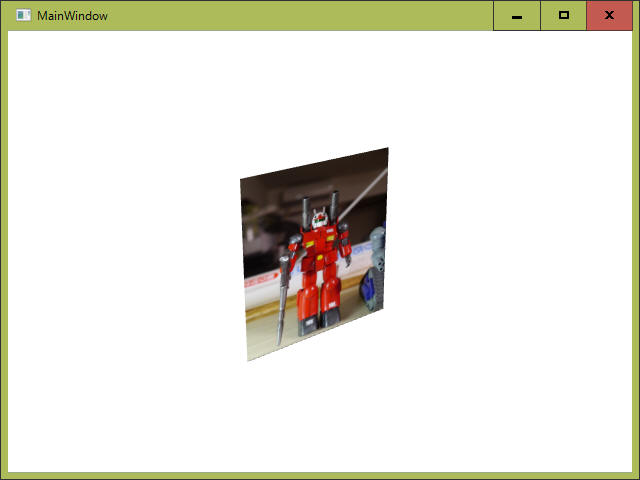
Camera(カメラ)をY軸を中心に回転させることで、3Dグラフィックスを回転させてみます。
[環境]
[実行結果]
連続写真を張ります。わかりますかね?
要点:
・回転させるために必要な 修正/追加 の部分を”黄色”でマーキングします。
・回転は、カメラをY軸を中心に回転させることで実現しています。"PersectiveCamera.Transform" で設定しています。
・回転の動画は、ViewPort3D.Triggers の中で定義しています。Storyboard の定義でアニメーションの内容を具体化します。
<Window x:Class="_3D_Texture_Image.MainWindow"
        xmlns="http://schemas.microsoft.com/winfx/2006/xaml/presentation"
        xmlns:x="http://schemas.microsoft.com/winfx/2006/xaml"
        xmlns:d="http://schemas.microsoft.com/expression/blend/2008"
        xmlns:mc="http://schemas.openxmlformats.org/markup-compatibility/2006"
        xmlns:local="clr-namespace:_3D_Texture_Image"
        mc:Ignorable="d"
        Title="MainWindow" Height="480" Width="640">
    <Grid>

        <Viewport3D>
            <!-- カメラ -->
            <Viewport3D.Camera>
                <PerspectiveCamera Position="-3,3,7" LookDirection="3,-3,-7" UpDirection="0,1,0" FieldOfView="45">
                    <PerspectiveCamera.Transform>
                        <RotateTransform3D>
                            <RotateTransform3D.Rotation>
                                <AxisAngleRotation3D x:Name="RotateCamera" Axis="0,1,0"/>
                            </RotateTransform3D.Rotation>
                        </RotateTransform3D>
                    </PerspectiveCamera.Transform>
                </PerspectiveCamera>
            </Viewport3D.Camera>

            <ModelVisual3D>
                <ModelVisual3D.Content>
                    <Model3DGroup>
                        <!-- ライト -->
                        <!--
                        <DirectionalLight Color="White" Direction="0,-1,-1"/>
                        -->
                        <AmbientLight Color="White"/>

                            <GeometryModel3D>
                            <GeometryModel3D.Geometry>
                                <MeshGeometry3D>
                                    <!-- 頂点 -->
                                    <MeshGeometry3D.Positions>
                                        -1,1,0
                                        1,1,0
                                        -1,-1,0
                                        1,-1,0
                                    </MeshGeometry3D.Positions>

                                    <!-- テクスチャ -->
                                    <MeshGeometry3D.TextureCoordinates>
                                        0,0 1,0 0,1 1,1
                                    </MeshGeometry3D.TextureCoordinates>

                                    <!-- 三角形 -->
                                    <MeshGeometry3D.TriangleIndices>
                                        0,2,3
                                        0,3,1
                                    </MeshGeometry3D.TriangleIndices>

                                    <!--
                                    <MeshGeometry3D.Normals>
                                        0,0,1 0,0,1 0,0,1 0,0,1 0,0,1
                                    </MeshGeometry3D.Normals>
                                    -->
                                </MeshGeometry3D>
                            </GeometryModel3D.Geometry>

                            <!-- マテリアル -->
                            <GeometryModel3D.Material>
                                <DiffuseMaterial>
                                    <DiffuseMaterial.Brush>
                                        <ImageBrush ImageSource="P1040735.jpg"/>
                                    </DiffuseMaterial.Brush>
                                </DiffuseMaterial>
                            </GeometryModel3D.Material>
                            <GeometryModel3D.BackMaterial>
                                <DiffuseMaterial>
                                    <DiffuseMaterial.Brush>
                                        Green
                                    </DiffuseMaterial.Brush>
                                </DiffuseMaterial>
                            </GeometryModel3D.BackMaterial>

                        </GeometryModel3D>
                    </Model3DGroup>
                </ModelVisual3D.Content>
            </ModelVisual3D>

            <Viewport3D.Triggers>
                <EventTrigger RoutedEvent="Viewport3D.Loaded">
                    <BeginStoryboard>
                        <Storyboard x:Name="myStoryboard">
                            <DoubleAnimation Storyboard.TargetName="RotateCamera" Storyboard.TargetProperty="Angle"
                                RepeatBehavior="Forever" From="0" To="360" Duration="0:0:10"/>
                        </Storyboard>
                    </BeginStoryboard>
                </EventTrigger>
            </Viewport3D.Triggers>
        </Viewport3D>

    </Grid>
</Window>
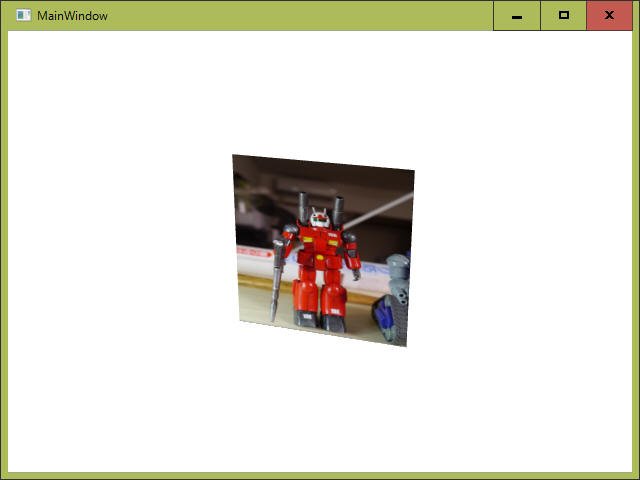
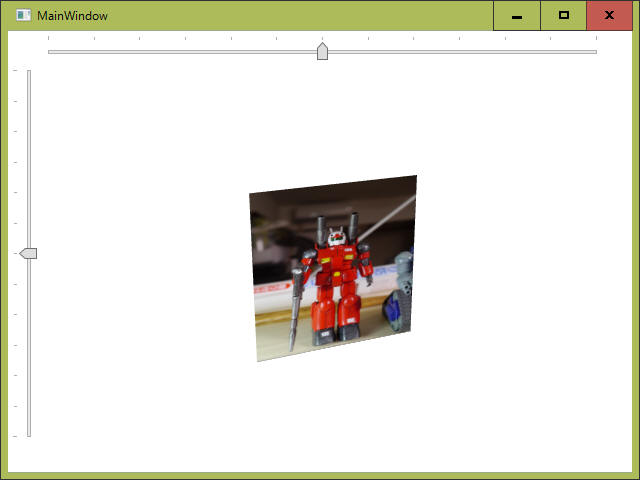
画面上に Slider を2つ付けて、これをマウスで操作することで3Dグラフィックスを回転制御できるようにします。
[環境]
[実行結果]
画面上と画面左のスライダーで回転を手動制御します。
要点:
・手動制御のために修正した部分を”黄色”でマーキングします。
・<DockPanel>へ変更して、<Slider>を画面の上と左に貼り付けています。
・AxisAngleRotation3D の axis とスライダーをデータバインディングします。
・複数の変換を同時に登録するには<Transform3DGroup>を使う必要があります。
<Window x:Class="_3D_Texture_Image_02.MainWindow"
        xmlns="http://schemas.microsoft.com/winfx/2006/xaml/presentation"
        xmlns:x="http://schemas.microsoft.com/winfx/2006/xaml"
        xmlns:d="http://schemas.microsoft.com/expression/blend/2008"
        xmlns:mc="http://schemas.openxmlformats.org/markup-compatibility/2006"
        xmlns:local="clr-namespace:_3D_Texture_Image_02"
        mc:Ignorable="d"
        Title="MainWindow" Height="480" Width="640">

    <DockPanel>

        <!-- 水平スライダー -->
        <Slider Name="slider_holizontal" DockPanel.Dock="Top" Margin="35,5,30,5" Maximum="180" Minimum="-180"
            SmallChange="1" TickFrequency="30" TickPlacement="TopLeft" LargeChange="30"/>
        <!-- 垂直スライダー -->
        <Slider x:Name="slider_vertical" DockPanel.Dock="Left" Orientation="Vertical" Margin="5,0,5,30"
            Maximum="180" Minimum="-180" SmallChange="1" TickFrequency="30" TickPlacement="TopLeft" LargeChange="30"/>

        <Viewport3D>
            <!-- カメラ -->
            <Viewport3D.Camera>
                <PerspectiveCamera Position="-3,3,7" LookDirection="3,-3,-7" UpDirection="0,1,0" FieldOfView="45">
                    <PerspectiveCamera.Transform>
                        <Transform3DGroup>
                            <RotateTransform3D>
                                <RotateTransform3D.Rotation>
                                    <AxisAngleRotation3D Axis="0,1,0"
                                        Angle="{Binding ElementName=slider_holizontal, Path=Value}"/>
                                </RotateTransform3D.Rotation>
                            </RotateTransform3D>

                            <RotateTransform3D>
                                <RotateTransform3D.Rotation>
                                    <AxisAngleRotation3D Axis="1,0,0"
                                        Angle="{Binding ElementName=slider_vertical, Path=Value}"/>
                                </RotateTransform3D.Rotation>
                            </RotateTransform3D>
                        </Transform3DGroup>
                    </PerspectiveCamera.Transform>
                </PerspectiveCamera>
            </Viewport3D.Camera>

            <ModelVisual3D>
                <ModelVisual3D.Content>
                    <Model3DGroup>
                        <!-- ライト -->
                        <!--
                        <DirectionalLight Color="White" Direction="0,-1,-1"/>
                        -->
                        <AmbientLight Color="White"/>

                        <GeometryModel3D>
                            <GeometryModel3D.Geometry>
                                <MeshGeometry3D>
                                    <!-- 頂点 -->
                                    <MeshGeometry3D.Positions>
                                        -1,1,0
                                        1,1,0
                                        -1,-1,0
                                        1,-1,0
                                    </MeshGeometry3D.Positions>

                                    <!-- テクスチャ -->
                                    <MeshGeometry3D.TextureCoordinates>
                                        0,0 1,0 0,1 1,1
                                    </MeshGeometry3D.TextureCoordinates>

                                    <!-- 三角形 -->
                                    <MeshGeometry3D.TriangleIndices>
                                        0,2,3
                                        0,3,1
                                    </MeshGeometry3D.TriangleIndices>

                                </MeshGeometry3D>
                            </GeometryModel3D.Geometry>

                            <!-- マテリアル -->
                            <GeometryModel3D.Material>
                                <!--
                                <DiffuseMaterial Brush="Red"/>
                                -->
                                <DiffuseMaterial>
                                    <DiffuseMaterial.Brush>
                                        <ImageBrush ImageSource="P1040735.jpg"/>
                                    </DiffuseMaterial.Brush>
                                </DiffuseMaterial>
                            </GeometryModel3D.Material>
                            <GeometryModel3D.BackMaterial>
                                <DiffuseMaterial>
                                    <DiffuseMaterial.Brush>
                                        <ImageBrush ImageSource="P1040735.jpg"/>
                                    </DiffuseMaterial.Brush>
                                </DiffuseMaterial>
                            </GeometryModel3D.BackMaterial>

                        </GeometryModel3D>
                    </Model3DGroup>
                </ModelVisual3D.Content>
            </ModelVisual3D>
        </Viewport3D>

    </DockPanel>
</Window>
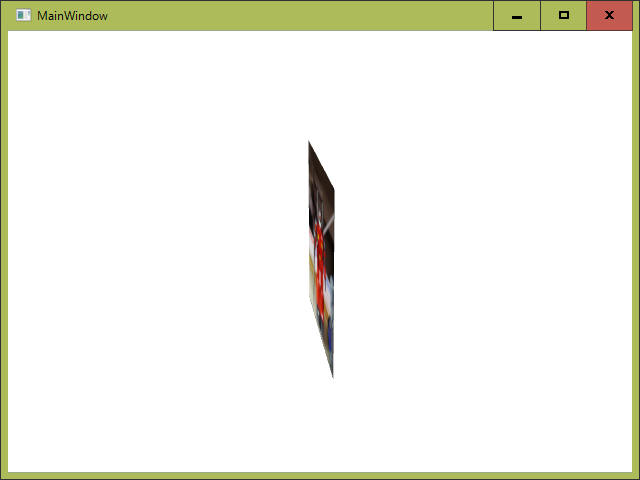
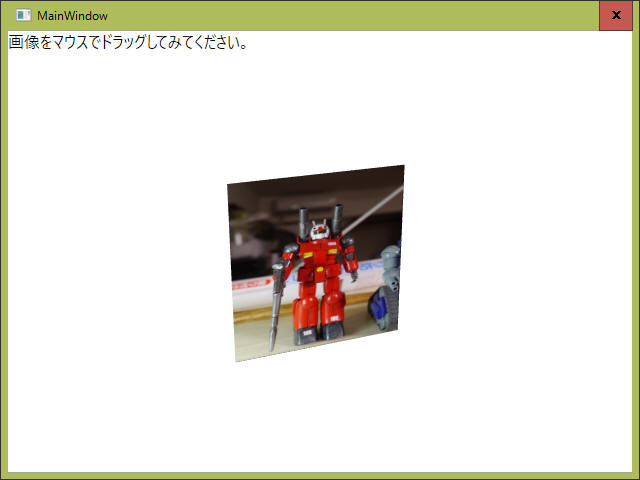
「ModelUIElement3D」を使用して、3Dグラフィックスを画面上でマウスドラッグすることで回転操作します。
[環境]
[実行結果]
動かないとよくわからないと思いますが、それでも一応張っておきます。
「画像をマウスでドラッグして見てください。」のメッセージだけ追加してみました。
要点:
・マウスの左ボタンダウンは、3D画像上でのみ受け付けます。<ModelUIElement3D ・・・ MouseLeftButtonDown="ModelUIElement3D_MouseLeftButtonDown">
がこれを意味します。
・マウスの移動、左ボタンアップは、ウィンドウ全体が受け付けます。
<Window ・・・
MouseLeftButtonUp="Window_MouseLeftButtonUp" MouseMove="Window_MouseMove">
がこれを意味します。
・他、 Mouse.Capture() の命令によりドラッグ中にマウスがウィンドウがいに出た場合の処理も実装しています。
["MainWindow.xaml"]
<Window x:Class="_3D_Texture_Image_03.MainWindow"
        xmlns="http://schemas.microsoft.com/winfx/2006/xaml/presentation"
        xmlns:x="http://schemas.microsoft.com/winfx/2006/xaml"
        xmlns:d="http://schemas.microsoft.com/expression/blend/2008"
        xmlns:mc="http://schemas.openxmlformats.org/markup-compatibility/2006"
        xmlns:local="clr-namespace:_3D_Texture_Image_03"
        mc:Ignorable="d"
        Title="MainWindow" Height="480" Width="640"
            MouseLeftButtonUp="Window_MouseLeftButtonUp" MouseMove="Window_MouseMove" ResizeMode="NoResize">

    <DockPanel>

        <TextBlock x:Name="textBlock" DockPanel.Dock="Top" Height="24" TextWrapping="Wrap"
            Text="画像をマウスでドラッグしてみてください。" VerticalAlignment="Top" FontSize="16"/>

        <Viewport3D>
            <!-- カメラ -->
            <Viewport3D.Camera>
                <PerspectiveCamera Position="-3,3,7" LookDirection="3,-3,-7" UpDirection="0,1,0" FieldOfView="45">
                    <PerspectiveCamera.Transform>
                        <Transform3DGroup>
                            <RotateTransform3D>
                                <RotateTransform3D.Rotation>
                                    <AxisAngleRotation3D x:Name="vertical_transform" Axis="0,1,0" Angle="0"/>
                                </RotateTransform3D.Rotation>
                            </RotateTransform3D>

                            <RotateTransform3D>
                                <RotateTransform3D.Rotation>
                                    <AxisAngleRotation3D x:Name="holizontal_transform" Axis="1,0,0" Angle="0"/>
                                </RotateTransform3D.Rotation>
                            </RotateTransform3D>
                        </Transform3DGroup>
                    </PerspectiveCamera.Transform>
                </PerspectiveCamera>
            </Viewport3D.Camera>

            <!-- ライト -->
            <ModelVisual3D>
                <ModelVisual3D.Content>
                    <AmbientLight Color="White"/>
                </ModelVisual3D.Content>
            </ModelVisual3D>

            <!-- モデル -->
            <ContainerUIElement3D>
                <ModelUIElement3D MouseLeftButtonDown="ModelUIElement3D_MouseLeftButtonDown">
                    <Model3DGroup>
                        <GeometryModel3D>
                            <GeometryModel3D.Geometry>
                                <MeshGeometry3D>

                                    <!-- 頂点 -->
                                    <MeshGeometry3D.Positions>
                                        <Point3DCollection>-1,1,0 1,1,0 -1,-1,0 1,-1,0</Point3DCollection>
                                    </MeshGeometry3D.Positions>

                                    <!-- テクスチャ -->
                                    <MeshGeometry3D.TextureCoordinates>
                                        <PointCollection>0,0 1,0 0,1 1,1</PointCollection>
                                    </MeshGeometry3D.TextureCoordinates>

                                    <!-- 三角形 -->
                                    <MeshGeometry3D.TriangleIndices>
                                        <Int32Collection>0,2,3 0,3,1</Int32Collection>
                                    </MeshGeometry3D.TriangleIndices>

                                </MeshGeometry3D>
                            </GeometryModel3D.Geometry>

                            <!-- マテリアル -->
                            <GeometryModel3D.Material>
                                <!--
                                <DiffuseMaterial Brush="Red"/>
                                -->
                                <DiffuseMaterial>
                                    <DiffuseMaterial.Brush>
                                        <ImageBrush ImageSource="P1040735.jpg"/>
                                    </DiffuseMaterial.Brush>
                                </DiffuseMaterial>
                            </GeometryModel3D.Material>
                            <GeometryModel3D.BackMaterial>
                                <DiffuseMaterial>
                                    <!--
                                    <DiffuseMaterial.Brush>
                                        Green
                                    </DiffuseMaterial.Brush>
                                    -->
                                    <DiffuseMaterial.Brush>
                                        <ImageBrush ImageSource="P1040735.jpg"/>
                                    </DiffuseMaterial.Brush>
                                </DiffuseMaterial>
                            </GeometryModel3D.BackMaterial>
                        </GeometryModel3D>
                    </Model3DGroup>
                </ModelUIElement3D>
            </ContainerUIElement3D>
        </Viewport3D>
    </DockPanel>
</Window>
[MainWindow.xaml.cs]
using System.Windows;
using System.Windows.Input;

namespace _3D_Texture_Image_03
{
    /// <summary>
    /// MainWindow.xaml の相互作用ロジック
    /// </summary>
    public partial class MainWindow : Window
    {
        private bool _isDrag = false;       // ドラッグ中フラグ true: ドラッグ中、false:ドラッグ中でない
        private Point _Offset;              // ドラッグ開始時点のマウス座標
        private double _oldAngleV;          // ドラッグ開始時点の3D画像回転角(垂直)
        private double _oldAngleH;          // ドラッグ開始時点の3D画像回転角(水平)


        private void ModelUIElement3D_MouseLeftButtonDown(object sender, MouseButtonEventArgs e)
        {
            // ドラッグ中にする
            _isDrag = true;

            // 3D画像の回転角を取得
            _oldAngleH = holizontal_transform.Angle;
            _oldAngleV = vertical_transform.Angle;

            // マウスの場所を取得
            _Offset = e.GetPosition(this);

            // マウスキャプチャーを取得
            Mouse.Capture(this);
        }

        private void Window_MouseLeftButtonUp(object sender, MouseButtonEventArgs e)
        {
            // ドラッグ中を解除
            _isDrag = false;

            // マウスキャプチャーを解放
            Mouse.Capture(null);
        }

        private void Window_MouseMove(object sender, MouseEventArgs e)
        {
            // ドラッグ中ならば3D画像を回転
            if (_isDrag == true)
            {
                // マウスの場所を取得
                Point pt = e.GetPosition(this);

                // 3D画像の回転角を更新
                vertical_transform.Angle = (-pt.X + _Offset.X) / 1.0 + _oldAngleV;
                holizontal_transform.Angle = (-pt.Y + _Offset.Y) / 1.0 + _oldAngleH;
            }
        }
    }
}
サンプルプログラムのダウンロードは こちら
本ページの情報は、特記無い限り下記 MIT ライセンスで提供されます。
| 2022-10-10 | - | ページデザイン更新 |
| 2015-08-06 | - | 新規作成 |